Kedgeree - it's what's not for breakfast

I have a weakness for all things British. It has been like this ever since I was informed at the age of twelve that my maternal great-grandfather's family emigrated from London. That changed everything. After that I suddenly preferred my tea with milk, I insisted that we buy crumpets from the supermarket, and informed most everyone who would listen that I was going to Oxford for law school. I had a wild imagination. Luckily, I also had a grand-mum who entertained my nonsense without much of a thought. I'd like to tell you that these strange affinities have dwindled with age, but in fact they haven't. Two Fat Ladies, Rosemary & Thyme, and all sorts of things I should not have an interest in for another forty to fifty years really make me happy. So, when I bought one of my first cookbooks after college, I quickly took note of a recipe called Kedgeree, which was described as an Anglo-Indian inspired brunch dish. This wasn't a dish I'd ever heard of or seen in a restaurant. If I was to get back to my "roots" as a proud Union Jack waiving citizen, I needed to know more.

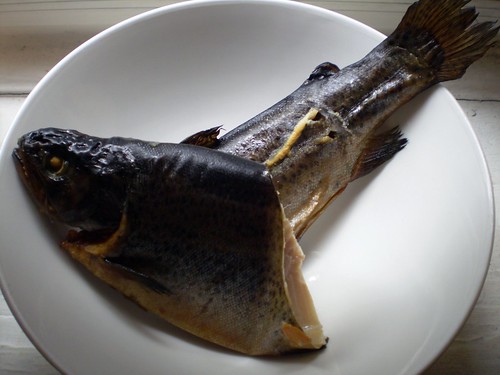
I have learned there are as many variations on this dish as there were colonies in the British Empire at the turn of the last century. Yet almost all them require some sort of smoked fish as the main ingredient. Now, I'm no stranger to smoked fish having grown up in New York, but eating lox on a bagel is a very different experience. As a kid, there were other types of smoked fish that appeared on the brunch table when we had company over, but they were things I thought only the old people ate (read - relatives visiting from Florida). Smoked sable, chubbs, and whitefish were foods I didn't dare try back then. Things have changed a bit, and today there are hardly any fish I dislike, so when I saw this beautiful locally caught smoked trout in the market, I was excited. But, come Sunday morning when I found myself skinning and deboning this trout for my first meal of the day, hands covered with fish grease and pin bones multiplying every time I looked down, I suddenly felt more like a pain au chocolat than Kedgeree.

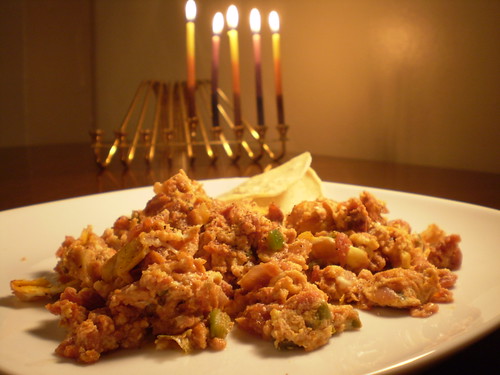
It is a good thing it took me all these years to try this dish, having stored it away in the back of my mind. I am much less squeemish than I used to be, so although the fish preparation was messy and a bit of a pain in the arse, I managed to make it through. And I'm glad I did, because basmati rice cooked with curry powder,  ginger, and garlic topped with a creamy sauce of fish and tomatoes is something worth working for. Enlivened by some fresh cilantro, the fish and rice combo was a dish that you want to keep eating because it's both different and familiar. I guess that is what's great about these old-fashioned cross-culinary inventions. Take two familiar tastes and put them together and you'll get something new to be excited about. Of course, Kedgeree isn't new to those in the know, but it was new to me, and I think it makes an excellent lunch or dinner option. Although, for brunch I'm sticking with my pastries and bagels and lox. After all, I am only one-eighth British. P2280246.JPG

Kedgeree Adapted from the Williams-Sonoma New England cookbook by Molly Stevens. You should feel free to vary the type of fish in this recipe for whatever is local to your area, and of course always check that it is a sustainable choice. Here's a link if you're not sure.

1 Tbsp butter + 2 Tbsp olive oil 1 onion, finely chopped 2 teaspoons, peeled and minced ginger 2 garlic cloves, minced 2 teaspoons, Madras curry powder Pinch of cayenene pepper 1 cup basmati rice 2 cups water 1/2 teaspoon salt 1/2 lb. smoked trout or other locally available fish, skinned and flaked 2 large tomatoes or about 1/2 can diced tomatoes 1/4 cup of heavy cream 1 scallion, chopped (optional) handful of chopped cilantro

In a heavy saucepan, heat the butter and 1 tablespoon of the olive oil. Add the onions and cook, stirring often, until softened. Takes about 10 minutes. Add the ginger, garlic, curry and cayenne and stir until the ginger and garlic are fragrant and softened, about 2 minutes. Add the rice and stir well to coat the grains.

Add the water, and bring to a boil. Once it is boiling, give it a stir, lower the stove to low heat, and cover with a lid. Let the rice cook for about 20 minutes. Do not open the lid.

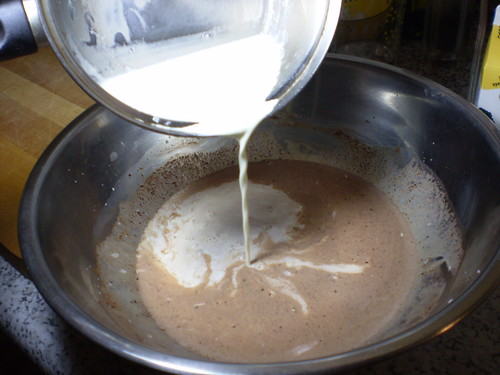
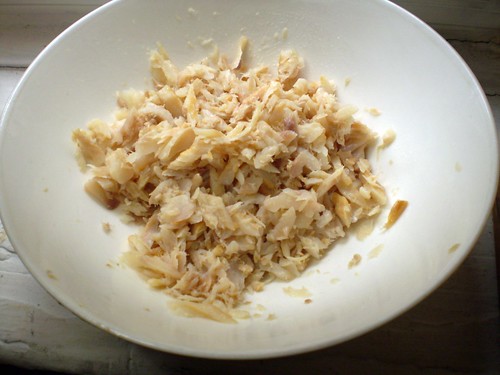
Meanwhile prep the tomatoes and the fish. Take care to remove the fish bones before flaking it. Take a skillet and warm the remaining tablespoon of olive oil. Toss in scallion (if your using it) and the fish. Cook until heated through about 2 minutes. Add the tomatoes and the cream and stir to combine. Sauce should be a light pink. Let cook for 3 minutes and taste it. Add a bit more cream if the smoked fish flavor still needs mellowing out.

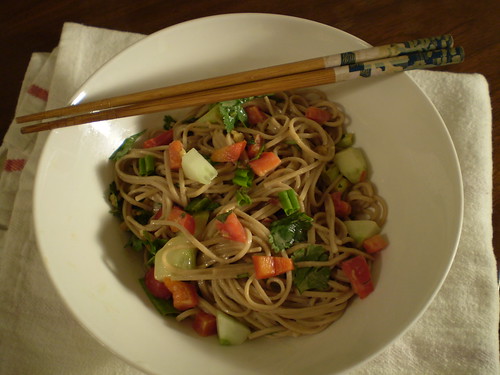
To serve, fluff the cooked rice with a fork and put a big old scoop in a bowl. Top with fish and a bit of sauce and the chopped cilantro.

A cheesy scone for teatime, or anytime

If you like tea and jam, then you probably know about scones. But, if flowery cups and saucers and sweet things are not your cup of tea (sorry) then maybe you're not a fan of them. Scones are a dense, sturdy type of biscuit that make me think of British ladies in funny hats at tea time. Actually, despite their association in my mind, I find scones very versatile and easier to adapt to different meals than say a muffin. There are many different types of scones, depending on where you live. (here's a brief history). The scones we often see in stores in the States are overly sweet. This recipe is a savory version with no sugar at all and works well not just at breakfast, but anytime a cheese infused baked good would be nice. And really, when isn't there such a time?

These savory scones were inspired by an old post by Clotilde of Chocolate & Zucchini. It was one of the first scone recipes I ever tried and it was a huge hit. It incorporates Clotilde's suggestions for how to make your own dried pears, which are easier than you'd imagine. Core a pear and place on a baking rack for 4 hours in a low temperature oven (175 deg F), flipping them half-way through. Just remember to dry them the night before you want to make the scones, and to avoid snacking on them, leaving you none left for baking. I have done it, and if you fall victim yourself, dried apricots finely chopped are a good substitute. I changed the type of cheese from the original recipe and tweaked the measurements a bit for what worked for me. I like using Gruyere cheese because it makes me think of France and French food, which in turn makes me think of Clotilde, who was one of my first introductions into the world of food blogging. I watched her blog grow with a mixture of admiration and jealousy. She made it all sound so lovely, living in Paris and discovering the joys of cooking. She was often my escape as I sat at my desk pretending to do work, reading about what I wanted to cook later that day. Her life seemed like a dream to me, filled with good smells and always something new and delicious to discover. I am glad that food blogging didn't disappear like a passing fad, but entrenched itself into our food culture, where we read and learn about cooking, and find inspiration and community. Food blogs have changed a lot since I started reading them, but the old posts are like old memories. It still thrills me to see my comment on her post from 2006 and remember how elated I was the first time I made this recipe. That's why I had to share it.

I have made these scones for tea parties, weekend brunches, and at times just for my own enjoyment. I generally eat them not in a dainty fashion, but standing over the kitchen counter slathering jam on them warm from the oven. That's really the key point to remember. You should think of these as the embodiment of what's great about home cooking. Your scones can be anything you want them to be, sweet or savory, plain or jazzed up. You do not need a special occasion more than a meal at home as your excuse to make these. Baking scones is all about doing something that makes you happy in your daily life, whenever you can make time, even if it's cheesy.

Cheesy Scones with Dried Pears Adapted from Chocolate & Zucchini. Feel free to substitute your favorite types of hard cheese and dried fruit in this recipe.

1 1/3 cup flour 3/4 teaspoon baking powder pinch of Cayenne pepper 3/4 teaspoon salt 3/4 cup grated Gruyere cheese 1/4 cup chopped dried pears 6 tablespoons cold unsalted butter, cut into small pieces 8 tablespoons cream (heavy, half&half) 1 egg yolk + 1 tablespoon of water, beaten

Preheat the oven to 350 degrees Fahrenheit. Line a baking sheet with parchment paper or a silpat.

Whisk flour through salt in a large bowl until combined. Add butter and rub into dry ingredients until mixture resembles course crumbs. I do this with my hands, working quickly.

Add cheese and pears and mix in with a fork. Add cream and mix gently until dough starts to come together. Add more cream if needed.

Turn dough out onto floured surface, giving it a gentle knead if it's not completely holding together. Roll out till it's a circle about 3/4 inch thick. If it's flatter that's ok, just means you'll have flatter scones. They're still tasty.

Place scones on baking sheet and brush top with egg mixture. Bake for 20-25 minutes, until puffy and golden. I like to rotate the baking sheet half-way through for even baking. Feel free to add a sprinkling of extra grated cheese on top 10 minutes before they're done.

There is a lot you can learn about love by making pudding

The hopeless romantic in me adores all things associated with Valentine's Day, the chocolates, the flowers, and the forced showing of affection. Actually that last part can't be counted on because as we all learn eventually love is fickle and at times fleeting, what can start out so promising and seem so perfect between two people can end up a complete disaster. This is why we should all be forced to make chocolate pudding before starting to date. I realized the similarities between turbulent relationships and custard as I sat home with the best of intentions making a batch of chocolate pudding the day before Valentine's. Home-made chocolate pudding can be made on the stove top, but there is the custard-based version that needs to bake in a water-bath before cooling. I grew up eating chocolate pudding that was made for me as a special treat. I was allowed to lick the spoon as a consolation prize for having to wait until the little serving bowls chilled. This was the extent of homemade dessert making in my house, and, I loved every minute of it. But, as I learned this Valentine's Day weekend, real pudding is more complicated than a box of My-T-Fine. Making custard, is an undertaking that one must know a little bit about before naively plowing ahead. When treated wrong, there are several things that can ruin a custard as it bakes, resulting not with the velvety smooth pudding of your dreams, but scrambled eggs. chocolate pudding gone wrong I was heartbroken that my pudding, which was as silky as a bowl of melted chocolate when it went into the oven, didn't have a happy ending. I searched frantically to try and find an explanation as to what went wrong. I sat down and stared in disbelief at the curdled mess in the ramekins. I tried to stir them and make them smooth again, but what's done is done. Then I realized (it being Valentine's Eve and all), that my shock at how this didn't go as expected reminded me of certain past relationships. Sometimes you can't just smooth things over. This is a lesson that all girls and boys should learn about love, because getting over a failed custard is a lot easier than a getting over a broken heart. Just the knowledge that pudding made with the best of intentions can morph into something utterly unattractive if things don't go as planned, might remind one to proceed with some caution in matters of the heart, as well as the oven. (I did finally figure it out what caused the disaster when a friend pointed me to Harold McGee's chapter on custard in On Food and Cooking -  now I know for next time, and have adapted the recipe to include the fix).

I say all this not to scare people off from making chocolate pudding (or falling in love). When done right, it's worth the extra effort (and infinitely better than some second-rate option that comes in a little plastic container). Like love, if it works it should feel comfortable, and something that is so pleasurable you're content to sit at home enjoying it, rather than the kind of dessert that needs to be dressed up with fancy swirls of decorative coulis to make you think it's worth your time. No matter how your chocolate pudding turns out, at least you'll have tried. And if it turns out you fail, you'll know more for next time. And, of course, there's always more pudding in the sea.

Chocolate Pudding Adapted from the Recipes from Home Cookbook, by David Page and Barbara Shinn. Do not tightly cover your baking dish with the ramekins or the temperature of the water bath will rise too high and the steam trapped inside the dish will cook the eggs too quickly causing them to curdle.

2 cups heavy cream 2.5-3 ounces best quality bittersweet chocolate (finely chopped) 3 large egg yolks 1/4 cup sugar 1/2 teaspoon vanilla Pinch of salt

Preheat the oven to 325 degrees Fahrenheit. Set out 4 ramekins and a deep baking dish large enough to hold them and a water-bath.

Bring the heavy cream to a simmer in a saucepan and then remove from the heat. Place the chopped chocolate in a stainless steel bowl and pour half of the cream over the chocolate. Let stand until melted. Stir until mixture is completely smooth and then add the other half of the cream.

Whisk egg yolks, sugar, vanilla and salt in a separate bowl. Gradually whisk in the melted chocolate mixture. Strain the pudding through a fine-mesh strainer and skim off froth on the top.

Pour the pudding into 4 small ovenproof (about 6 oz) ramekins. Place them in a deep baking pan and put pan in the oven. Add enough hot water to the pan to reach halfway up the sides of the ramekins. Cover loosely, with tin foil. Make sure there is room for air to escape and ensure that the pan does not trap the steam. Bake for about 50 minutes, or until puddings look set around the edges, but not quite in the center. Give them a shake to tell.

Remove ramekins from the water bath and let cool to room temperature before placing in the refrigerator to cool completely.

Beating the winter doldrums with chili spiked whipped root vegetables

February produce in a four-season climate leaves much to be desired. Chances are most of you don't associate joy with the word turnips. Does the thought of parsnips make you wonder if you can live on pasta alone till spring? If the avocados and tomatoes in your supermarket from far away have you thinking about cheating on your attempts to eat more seasonally consider this -chili spiked whipped root vegetables. I promise they're as creamy and comforting as a bowl of regular mashed potatoes, and with a little extra spice they're just the thing to help you get excited about what little we have to work with this time of year.

This dish is made up of a mixture of parsnips, turnips and a potato or two. It could easily be adapted to whatever root vegetables you prefer. If you have never considered cooking a parsnip or a turnip, let this be your gateway dish. After all, when you add butter and sour cream to a vegetable it becomes much more enticing to most skeptics. The chili powder is an idea I borrowed from a mashed potato recipe in the The San Francisco Chronicle cookbook. The recipe suggested the chili was supposed to "chase away the blues" and I figured given my less than cheery disposition (and most people I came across) this past Monday, it was worth a shot. What resulted was a buttery, slightly sweet, red-hued dish that should wake you up from your winter doldrums and make your diners take notice. The spice is gentle enough that this is definitely still comfort food. Turnips and parsnips are slightly lighter than plain old potatoes, and if you take the time to whip them they will produce an almost fluffy puree. (I was able to get a consistency I was content with using a hand-held mixer. If you were serving this for company and were aiming for a perfect puree it might help to pull out the heavier equipment, the stand-mixer or a food processor). The start of Spring is only a month and a half away, but while we still have to brave the cold for a little while longer, do what you need to to keep your spirits up, especially if it involves a whole lot of butter and chili powder.

Chili-Spiked-Whipped-Root-Vegetables Recipe influenced and adapted from two different sources - the James Beard Foundation website and The San Francisco Chronicle Cookbook.

3 medium parsnips, peeled and diced 1 large baking potato, peeled and diced 2 to 3 medium turnips, peeled and diced 1/4-1/2 cup sour cream, or to taste 6 Tablespoons butter, softened 1 Tablespoon chili powder, or more to taste Coarse salt and white pepper to taste Chopped cilantro for garnish

Place the vegetables in a pot with enough salted water to cover. Bring to a boil and cook until the vegetables are very tender, about 30 to 40 minutes. Drain well.

Place the cooked vegetables in a bowl and whip until mashed (this can be done with a hand-mixer or in a stand mixer). Slowly incorporate the remaining ingredients, then whip at high speed for about one minute to lighten the mixture.

Stir in the chili powder and salt and pepper. Taste, and adjust seasons accordingly. Garnish with cilantro before serving.

Raiding-the-Cabinets-Roasted-Chickpeas

P1170074It is bitterly cold in Brooklyn this weekend. There is not even the promise of snow that could help me forget about how miserable this weather can be. The windchill is in the single digits and going outside seems like a very bad idea. I find myself stuck indoors, unprepared to face a weekend with only what I have in the cabinets. I opened, and re-opened the cabinet, hoping for something exciting I didn't notice the first five times I looked. Finally, I decided to reach towards the back and grab a can that had been in there for quite some time.  Canned chickpeas. No, I didn't want hummus. And, no making a salad wasn't an option, given the absence of anything green in my refrigerator. I decided today was the day to try making roasted chickpeas. Turns out, although it's not a quick fix for a snack, it is a versatile, economical, relatively healthy, easy option to know about when your best bet for something to snack on has to come out of a can.  P1170095 The recipe I used combined two different recipes for a Moroccan spice-mix version, to which I added a few adaptions of my own. It bears mentioning that a recipe for roasted chickpeas is like a game of telephone, each time the information is passed on, it changes a bit. I say this because I've come across tons of variations on how to flavor the little buggers as well as how hot your oven should be and how long to cook them. In fact, while I was prepping the chickpeas for the oven, and loudly cursing my crappy can-opener, my friend (who I was on the phone with) consulted her recipe for this dish and read me yet another very different interpretation of how to roast chickpeas.

That said, I think where this snack gets interesting is in how you choose to flavor the chickpeas. I liked the Moroccan spice mix just fine.  It did make my apartment smell like a shawarma restaurant, but it was an powerful flavor. I think these would also make a great Superbowl snack, flavored with some Creole seasoning as a nod to New Orleans, perhaps. Either way it was fun to make this little snack, and made me feel good about using what was already in my kitchen. I'm including a few different flavor options, depending on what's within your reach that day.

Roasted Chickpeas For flavor options, including the Moroccan Spice Mix I used, see below. Recipe adapted from Kalyn'sKitchen.com

2 can chickpeas, preferably organic 2T olive oil 1/2 teaspoon - 1 teaspoon spice mixture of your choice (go lighter on stronger flavors) salt to taste

Preheat oven to 400 F. Drain chickpeas into a colander and rinse well with cold water until no more foam appears. Let beans drain for 5-10 minutes, then pat dry (crucial step to avoid mushy chickpeas) and rub off any of the translucent skins that may be falling off.

When beans are well drained and dried, toss with olive oil, spice mix of your choice, and salt. Arrange in single layer on large baking sheet. Roast 40-50 minutes, or until they are slightly browned and make a rattling sound when you shake the baking sheet and appear crunchy enough for you. Testing one is your best bet. Serve warm or let cool.

Moroccan Spice Mix 1 3/4 tsp. ground cumin 1 tsp. ground coriander 1/2 tsp. chile powder 1/2 tsp. sweet paprika 1/2 tsp. ground cinnamon 1/4 tsp. ground allspice 1/4 tsp. ground ginger 1/8 tsp. cayenne pepper

Creole Spice Mix 2 tablespoons paprika 1 tablespoons salt (I lowered this because of salt in the original recipe) 2 tablespoons garlic powder 1 tablespoon freshly ground black pepper 1 tablespoon onion powder 1 tablespoon cayenne 1 tablespoon dried oregano 1 tablespoon dried thyme

Other Ideas Spicy version - add 2 teaspooms of chili powder + a few dashes of hot sauce. Salt &Vinegar - toss roasted chickpeas cider vinegar and sea salt to taste. Indian inspired version - add 2 teaspoons of garam masala.

Roasted Chickpeas With A Creole Spice Mix on Foodista

Espresso-Maple-Walnut Nanaimo Bars

I did it. I completed my first Daring Bakers Challenge. The January 2010 Daring Bakers’ challenge was hosted by Lauren of Celiac Teen. Lauren chose Gluten-Free Graham Wafers and Nanaimo Bars as the challenge for the month. The sources she based her recipe on are 101 Cookbooks and www.nanaimo.ca. I have never made graham crackers before, and decided to stick with wheat flours for this one being that I'm not gluten-free. These super sweet treats are popular in the Vancouver area, so in honor of the upcoming 2010 Winter Olympic games this was a great recipe to try.  My first surprise was that the non-gluten free graham cracker recipe didn't require graham flour. I, like many others, assumed there must be something complicated involved with making these childhood favorites. Otherwise, why is it so rare to hear about homemade versions? After trying this recipe, I conclude it might be rare to see homemade versions because the sticky dough makes it a bit difficult to get the crackers as thin as store bought versions. This problem was partially remedied by chilling and rolling out the dough in small batches. I must admit that I didn't love this recipe's results. It had the familiar smell of graham crackers, that warm honey, molasses-y scent you know, but none of the mouth-feel of a true graham cracker. It wasn't grainy, but more solid like a tough cookie. I'm curious to know if the texture of the gluten-free version was truer to the original. Regardless, now that I have demystified graham crackers, I definitely think I would attempt homemade grahams again, but preferably using graham flour. Once the graham crackers were done, they were used to make graham cracker crumbs (this would have really bothered me, had I liked them enough to eat them plain). The crumbs are mixed with cocoa powder, shredded coconut, and nuts to form the bottom layer. I only had finely shredded unsweetened coconut on hand, and chose walnuts for the nuts. I intentionally left some of the graham crackers in bigger chunks rather than pulverizing the whole amount thinking it might be more interesting. Chocolate and grahams trigger thoughts of s'mores for me, and I think that was where the thought came from. P1260107.JPG

P1260111.JPG The middle layer is the custard layer. It seemed more like a frosting flavored with the popular British custard powder, Bird's. It was mostly powdered sugar, blended with butter and a bit of milk (I didn't have cream on hand). Lauren, the challenge's host, mentioned this layer was the place to add in additional flavoring. I originally intended to do a mint flavor since it was a chilled bar with chocolate. Instead, I decided to stick with the Canadian theme and use maple syrup. I added two tablespoons in the hopes of being able to distinguish the maple flavor over all the icing sugar.

The top layer was simply melted semi-sweet chocolate with a bit of butter. I added a shot of espresso that I brewed, hoping it would be a good counter-balance to all this sweetness. It's rare that I'm wary of the level of sugar in something, but these bars had me wondering if they might be an acquired taste. I do love the idea of how easily the basic formula can be adapted to different flavors. I'm also thankful I got to learn a little bit about a dessert I had never heard of. I would rather be trying one of these sweets in Vancouver, but when I make it there eventually, I'll know to look out for them. Meanwhile, I have the perfect figure-skating watching snack waiting in my freezer for when the games start.

Espresso-Maple-Walnut Nanaimo Bars I have reprinted the recipe with the few changes I made. The recipe for homemade graham crackers is below.

For the bottom layer of Nanaimo bars: 1/2 cup (115 g) (4 ounces) Unsalted Butter 1/4 cup (50 g) (1.8 ounces) Granulated Sugar 5 tablespoons (75 mL) Unsweetened Cocoa 1 Large Egg, Beaten 1 1/4 cups (300 mL) (160 g) (5.6 ounces) Graham Wafer Crumbs 1/2 cup (55 g) (1.9 ounces) Walnuts, finely chopped 1 cup (130 g) (4.5 ounces) shredded Coconut (unsweetened)

For the middle layer: 1/2 cup (115 g) (4 ounces) Unsalted Butter 2-3 tablespoons and 2 teaspoons (40 mL) whole milk 2 tablespoons real maple syrup 2 tablespoons (30 mL) Bird's Custard Powder 2 cups (254 g) (8.9 ounces) Icing Sugar

For the top layer: 4 ounces (115 g) Semi-sweet chocolate 2 tablespoons (28 g) (1 ounce) Unsalted Butter 1 shot of freshly brewed espresso

1. For bottom Layer: Melt unsalted butter, sugar and cocoa in top of a double boiler. Add egg and stir to cook and thicken. Remove from heat. Stir in graham crumbs, nuts and coconut. Press firmly into an ungreased 8 by 8 inch pan. 2. For Middle Layer: Cream butter, cream, custard powder, and icing sugar together well. Beat until light in colour. Spread over bottom layer. 3. For Top Layer: Melt chocolate and unsalted butter over low heat. Cool. Once cool, pour over middle layer and chill.

For the Graham crackers: 2 1/2 cups + 2 tablespoons all-purpose flour 1 cup (200 g) (7.1 ounces) Dark Brown Sugar, Lightly packed 1 teaspoon (5 mL) Baking soda 3/4 teaspoon (4 mL ) Kosher Salt 7 tablespoons (100 g) (3 ½ ounces) Unsalted Butter (Cut into 1-inch cubes and frozen) 1/3 cup (80 mL) Honey, Mild-flavoured such as clover. 5 tablespoons (75 mL) Whole Milk 1 tablespoons (30 mL) Pure Vanilla Extract

1. In the bowl of a food processor fitted with a steel blade, combine the flour, brown sugar, baking soda, and salt. Pulse on low to incorporate. Add the butter and pulse on and off, until the mixture is the consistency of a coarse meal. If making by hand, combine aforementioned dry ingredients with a whisk, then cut in butter until you have a coarse meal. No chunks of butter should be visible. 2. In a small bowl or liquid measuring cup, whisk together the honey, milk and vanilla. Add to the flour mixture until the dough barely comes together. It will be very soft and sticky. 3. Turn the dough onto a surface well-floured with sweet rice flour and pat the dough into a rectangle about 1 inch thick. Wrap in plastic and chill until firm, about 2 hours, or overnight. 4. Divide the dough in half and return one half to the refrigerator. Sift an even layer of sweet rice flour onto the work surface and roll the dough into a long rectangle, about 1/8 inch thick. The dough will be quite sticky, so flour as necessary. Cut into 4 by 4 inch squares. Gather the scraps together and set aside. Place wafers on one or two parchment-lined baking sheets. Chill until firm, about 30 to 45 minutes. Repeat with the second batch of dough. 5. Adjust the rack to the upper and lower positions and preheat oven to 350 degrees Fahrenheit (180 degrees Celsius). 6. Gather the scraps together into a ball, chill until firm, and reroll. Dust the surface with more flour and roll out the dough to get a couple more wafers. 7. Prick the wafers with toothpick or fork, not all the way through, in two or more rows. 8. Bake for 12 minutes, until browned and slightly firm to the touch, rotating sheets halfway through to ensure even baking. Might take less, and the starting location of each sheet may determine its required time. The ones that started on the bottom browned faster.

I'm no good without my morning coffee

I am a lucky girl. I had the really hard assignment of going to review my local coffee shop, Oslo, this past Sunday with Hagan of 93 Plates.  So basically that meant walk around my corner for a cup of coffee (earlier than I'm used to, which made the coffee more enticing) and sample a few of their pastries. I was pretty psyched to learn a bit more about a place that's part of my daily routine and that I already loved. Yes, read on for more of this unbiased review.

This coffee shop is one of the reasons I love my neighborhood. Williamsburg, Brooklyn is one of the only "gentrified" neighborhoods in all of the five boroughs without a Starbucks or other chain coffee shop. We've got several seriously better options anyways, so it's definitely not something that people around here are missing. Unless you like ordering venti-double-shot-half-caff-soy-sugar-free-caramel-flavor lattes. In which case you should be shot, but I don't advocate violence on this blog (I'm KIDDING).

The reasons to love this place actually have nothing to do with anti-chain coffee store sentiments. They're more taste-based reasons rather than business-model related. They roast their own beans locally in Williamsburg. There are several types all named after Viking Gods. Thor, the house-blend drip coffee is a mix of 5 different types of beans, Freya is a dark roast, and Odin is their espresso blend. I usually get a cup of regular coffee, or a cafe au lait. I'm a big fan of the Thor blend. (and yes, for you comic geeks out there, there is a Marvel comic by the name of Thor which I have seen floating around the store). Hagan ordered a cafe Breve, which as I learned is made with cream in place of milk. I was a little jealous that his came with the pretty latte art. This is not the place you come to for brunch, but they do have some delicious croissants and muffins. We had a zucchini-peach-pecan muffin, which was much better than it sounds. It was similar in taste to a ginger cake with bits of peaches. And the croissants are always solid too. They come in daily so they're not those saran-wrapped faux-croissants that are similar to rolls. I just couldn't deal with that in the morning.

Oslo is a great place to stop for coffee if you're visiting the neighborhood and a great institution if you live here. Mornings are not so bad after all.

Oslo Coffee 133-B Roebling Street or 328 Bedford Street, Williamsburg, Bklyn 11211 http://oslocoffee.com

Gingerbread Cookie Decorating Party

PC130198.JPGI love gingerbread. It is a holiday classic. It may not be inventive or cutting-edge, but not everything should be. The recipe I follow came from Bon Appetit's December 2006 issue. It is slightly spicy, with a deep brown-sugar and molasses flavor. It puts a twist on tradition by suggesting you flavor your icing with juniper berries. This part I could take or leave. I know there are a million and one gingerbread recipes out there, and every year I say I'm going to experiment with others, but for the last three years all those who have tried them seem to love them so that I haven't found a reason to mess with a good thing. I wanted to share this recipe with you in case your looking for a well-tested classic version. PC130180.JPG I normally make these cookies at least twice during the holiday season. The first batch always seems to disappear before being wrapped up and gifted out to friends and family. The only changes I've made to the original recipe are switching out light brown sugar for dark, and using unsulphured blackstrap molasses in place of regular. It's a subtle change that make for a more intense cookie. It is the perfect cookie to practice your decorating skills on (and I learned I could use a LOT more practice) and make into a snowy weekend project. This batch was made after a wonderful holiday brunch my cousin hosted during Hanukkah. It was too cute to see four people each measuring out different ingredients and generally buzzing around the table. mosaic62cb9d129a8a15fe6a2da6004ae037425bbca69e mosaic05fb6e7b331d4d03440f57c3877176aaa71cd18b After the dough rested, we set up two separate rolling stations (photos at this point were getting a bit blurry after a few mimosas) and went to work lining up the cut out shapes on silpat or parchment-lined baking sheets. This would be perfect work for little kids, but the only kid we had on hand was still too little to help. Not that any of us big kids seemed to mind handling the task. These cookies bake up crisp, and the thinner you roll them out the crisper they will be. We went with about 1/4 inch thickness on the dough to have them be a bit more chewy. They also need to be carefully watched towards the end of the baking time, unless you don't mind them a bit well-done around the edges (I save those imperfect ones for myself). PC130194.JPG Once they're baked, let them cool and prepare the royal icing to decorate as you wish. That's when the real fun comes in. This time around we skipped the juniper flavor used in the original recipe (of course if you want to give the juniper a try, find it here). We used lime juice in place of lemon juice for the royal icing, simply because we were out of lemons. But we all agreed the lime was a nice little twist that we would make again. We used Martha Stewart's royal icing recipe, and it was a very good thing.

Gingerbread Cookies Adapted from Bon Appetit. See links above for two different icing options.

2 1/4 cups unbleached all purpose flour 1 teaspoon ground ginger 1 teaspoon ground allspice 1/2 teaspoon ground cinnamon 1/2 teaspoon baking soda 1/2 teaspoon salt 1 cup (2 sticks) unsalted butter, room temperature 1/2 cup (packed) dark brown sugar 1/4 cup blackstrap molasses

Whisk first 6 ingredients in medium bowl. Beat butter and sugar in large bowl until fluffy. Beat in molasses. Beat in dry ingredients. Gather dough; divide into 4 pieces. Shape into disks. Wrap; chill at least 2 hours and up to 2 days.

Preheat oven to 350°F. Line 2 baking sheets with parchment. Roll out 1 dough disk to 1/8-inch thickness. Using 3 1/2-inch cutter, cut out cookies. Transfer to sheet. Gather scraps; chill.

Bake cookies until almost firm in center, 12 minutes. Cool on sheets 2 minutes, then cool on racks. Repeat, using all dough.

Note: Cookies can be stored in an airtight container at room temperature up to 3 days or freeze up to 2 weeks.

Holiday Lace Cookies

PC160250.JPG You know these cookies. You've seen them in the cookies by the pound section of the bakery case. You've even eaten them before and loved them, most likely without knowing their name. They're an old-fashioned cookie, generally known as Lace Cookies because of their porous looking appearance. It appears there are lace cookie variations from one European country to another (like most cookies). French lace cookies were traditionally made with almonds, while Irish lace cookies were made with oatmeal and milk or cream, and German lace cookies are also oatmeal-based cookies, but with ginger, cloves and cinnamon added. My recipe came from the Fannie Farmer Cookbook, originally written to help bring some consistency to our young country, by creating recipes that were formulas. Fannie (as I like to call her) Americanized things in the process by removing any country of origin, and simply called them Lace Cookies. Additionally, many newer American versions today call for corn syrup, but I prefer to bake with butter when I can.

PC160213.JPG

I'm entering this into the Share Our Strength, 12 Days of Sharing cookie jar. (A great cause, read more about it at In Jennie's Kitchen).This cookie recipe should be categorized under, Stupidly Simple, because it is. Mix dry ingredients in a bowl. Pour melted butter over it, then a beaten egg and some vanilla. Drop onto a cookie sheet and bake. Nothing more too it. It's the kind of recipe you'd be well-served committing to memory to whip up off the top of your head while visiting family, or away for the weekend skiing. The results would impress your onlookers and fool everyone into thinking your a culinary whiz in the kitchen. Sit back, smile, and think, "Ha, ha."

There's only a few tricks to know how to pull this recipe off without a hitch. First, you must must space the cookies at least 1 1/2 inches to 2 inches apart, depending on the size of your cookies. Second, you should stay close to the oven while these babies are baking. They go from well-done to slightly burnt quickly. My suggestion is to keep the oven light on (if you have one) and keep an eye on them after they've been in there for 3 minutes. Plus, it's fun to watch the cookies bubble away and bake. Third, you really must use some patience and give them a few minutes to cool before you try to move them off the cookie sheet. If you slide your spatula under one while it is still hot it will squish into the middle and resemble a piece of caramel. That is an irreversible error. Obviously it will still taste good, but baked goods should also look good too.

mosaic12198e095cd8ebebc96159ac667b67bc5cd6a1fe

mosaice19e9f8404f44b4fbc21594743037eefd1237261

This being a holiday cookie, you should consider some options to gussy up your cookie creation. Consider shaping the cookies into a tuille by bending them around the handle of a wooden spoon while still warm (not hot). Then let them cool in that shape. This is a pretty example of how a tuille shape makes a more impressive presentation. My personal favorite is the way I had them as a kid, where the bottom is coated with melted chocolate. Yum. And, coating things with chocolate seems like a good task to include the kiddies in on. (Personally, I wish someone had let me do that as a kid, rather than play with a dreidel. I'm just saying.)

PC160245.JPG

Holiday Lace Cookies Adapted from The Fannie Farmer Cookbook

1 1/2 cups uncooked oatmeal (not anything instant or quick-cooking) 1 1/4 cups brown sugar 2 tablespoons flour 1/2 teaspoon salt 2/3 cup (about 10 tablespoons) melted butter 1 egg, lightly beaten 1/2 teaspoon vanilla

Preheat the oven to 350 degrees Fahrenheit.

Mix the dry ingredients together in a big bowl. Melt the butter. Add to the dry ingredients and mix to combine. Add the egg and the vanilla and mix until all incorporated.

Line a baking sheet with a silpat or parchment paper. Drop cookies about 1/2-1 teaspoon at a time onto cooking sheet. Take care to keep them spaced about 2 inches apart. They will look small but will spread as they bake. Bake in the oven for 5 minutes or until firm. Watch them closely after 3 minutes, depending on how well done you want them. Let cookies cool on the baking sheet for a few minutes before you touch them. Carefully, using a spatula lift off baking sheet to cool completely.

12DaysCookies_badge-1

Fourth-Night-Hanukkah-Huevos

PC140206.JPGI did some Hanukkah food research today, and to my surprise there are two schools of thought. One belief is that holiday foods must be fried, while others merely require the food be cooked with olive oil. The holiday foods I grew up with were always fried, so I assumed that is what they needed to be. But after consulting with the all-knowing, all-seeing internets, I realized that there are sources out there that do not feel the frying aspect is necessary. Despite fried food's deliciousness, I decided that I don't need to celebrate this particular miracle from thousands of years ago with trying to create my own miracle (namely not gaining a pants size or clogged arteries from eating fried food for 8 days). I'm going with the more sensible, "cooked with olive oil" tradition.

With that cleared up, I proceeded with a quick light supper (borrowed from my brunch repertoire) of Huevos a la Mexicana. It is basically eggs scrambled with the colors of the Mexican flag, green (chiles), white (onions), and red (tomatoes). It is another one of these modest dishes where a few very ordinary ingredients combine to make a fine meal. I always serve these egss with small corn tortillas for a more authentic flavor then the supermarket flour type.

Cook the onions in miraculous wonderful olive oil until translucent, then add the chiles (leave the ribs on for a spicier version), and the tomatoes. Cook for about 5 minutes until some of the juice from the tomatoes renderss out a bit, and the chile is no longer raw. Then pour in some beaten eggs and mix it altogether. Cover and let the eggs set. That's it, nothing fancy. Although this is not holiday fare to serve your relatives, it is technically within keeping with the tradition. It will allow you to bravely plough through one of the eight days without feeling remorse for subsisting on fried food and holiday cookies for the next week (or two). Viva la revolución!

PC140210.JPG

Hanukkah Huevos (a la Mexicana) Adapted from Mexico, The Beautiful Cookbook.2 tablespoons olive oil 1/4-1/2 onion, chopped 2 chiles, finely diced (serrano or jalapeno) 1 tomato chopped (or about 3/4 cup of diced canned tomatoes) salt 3-4 eggs, lightly beaten


Heat the oil in a skillet. Add the onion and saute until transparent. Add the chiles, tomato, and salt and cook over medium heat for about 5 minutes. Add the beaten eggs to the pan and stir to incorporate. Cover and cook for 2-3 minutes or until eggs are set. Break up with a wooden spoon once done. Serve with warm corn tortillas.

First-Night-Carciofi-alla-Judea

PC100148.JPGHanukkah may have some traditional foods, potato latkes (aka potato pancakes) and sufganiyot (aka jelly doughnuts), but in general the rule is anything fried goes. So, while shopping for potatoes to make latkes, I changed my plans when I saw these striking artichokes in the market. I had to have them. They were beautiful and festive, perfect for a holiday meal. Next, I set out to think about what I could do with artichokes for the first night of Hanukkah. I recalled reading about a fried artichoke preparation that originated in the Jewish ghetto of Rome, simply called Carciofi alla Judea (for more about the history of this dish click here). I have never had one of these prepared for me, but I thought, "how could anything fried taste bad?" Unfortunately, there was nothing miraculous about this meal, except for the amount of olive oil I wasted. PC110153.JPG I jumped on this idea, lured by images of lightly browned, crunchy, earthy artichoke petals that would impress you and inspire you to put down the potatoes and fry something different. I didn't do my research. If I had I would have seen that this dish is best prepared with baby artichokes, for their more tender leaves. I might also have realized that frying them whole was an option, as used in some other versions of this recipe. PC110159.JPG The recipe that I found and put my faith in (it was on a great Jewish blog after all) called for peeling off the tough outer leaves and slicing the artichoke in half before you start on the two-step process of cooking them in a mixture of olive oil and water until softened (see the photo above), and then frying them until crispy. PC110167.JPG My artichokes looked like fried goodness, glistening as they came out of the olive oil. After a sprinkle of some fleur de sel salt and a squeeze of lemon I could barely wait to grab a piece. I started with the outer leaves that looked more well-done, hoping that it would taste like a crispy french fry. Not exactly. The tops of the leaves were tough and difficult to chew, if not near impossible. "Ok", I thought, not giving up hope, "the inside leaves will be better". They were better, but not great. In the end, I resorted to eating the leaves as if they were steamed, scraping the tender bottom part off and discarding the rest of the leaf. We agreed that it seemed like a waste and definitely not the intended result. PC110175.JPG The one saving grace of this dish was the artichoke heart. I guess that's why I couldn't be too upset. It was tender and a bit smoky tasting from the oil. It was definitely good eating, especially with a bit more salt. I'm sure my inexperience in making these was to blame for the flawed result. However, I bet they could be spectacular when done correctly, so please do not let that discourage you from trying this dish (just make sure to get baby artichokes). And, the best part of Hanukkah, there are 7 more nights to fry things and get them right.

Carciofi alla Giudia Reprinted from The Jew and the Carrot (http://www.jcarrot.org)

4 medium sized artichokes (look for vegetables with soft, long, flexible stems) 1 lemon Plenty of olive oil Sea salt to taste

Fill a large bowl with water and the juice of one lemon. Working one artichoke at a time, trim the stem to 1 1/2 – 2 inches. Using a vegetable peeler, remove the outer dark green layer of the stem, revealing the softer, lighter green center. Cut off the artichoke’s thorny top (horizontally) using a serrated knife and then carefully slice the artichoke in half, (vertically).

Remove the artichoke’s tough outer leaves until only the soft inner leaves remain. Using a small spoon, remove the hairy “choke” at the center of each artichoke half. (It may seem like you are wasting a lot of the plant –which is kind of true. Assuage your guilt by composting them!)

At this point, open your windows and turn on a fan!

Fry #1: Select a pot that is large enough to comfortably hold all of the artichoke halves. Place them in the pot, fill with oil until chokes are half covered. Then add water to cover. Bring pot to a simmer and cook, uncovered, about 15 minutes until they are cooked but not too soft. Remove with tongs and place on a platter.

Fry #2: Heat about one inch of oil in a cast iron pan (or other heavy pan). Using a pair of tongs, and lots of care, place the choke halves side down in the oil. Be really careful–hot oil splatters and hurts.

Fry for about 12 minutes, flipping the chokes halfway through, until brown and crispy on both sides. Turn off the heat and remove the fried chokes with tongs. Place onto paper towels to drain. Sprinkle with salt and serve warm.

A-Smashing-Chicken-Potato-Tomato-Bake

PC040134.height=

Simple pleasures are best, right? Well, dinner tonight was simple, so I guess that's why it was also the best one I've had in quiet awhile. I made an improvised winter version of a Jamie Oliver recipe for chicken thighs. Seasonal swaps included - summery cherry tomatoes for good quality canned Italian ones, and fresh oregano for some rosemary. I made do with skinless chicken this time, although the alternative would have been much better since the recipe called for frying the chicken until three-quarters of the way cooked first. I missed out on crispy skin, but this extra step (rather than just throwing it all in a pan to bake) was such a great idea that I got a good sear on mine and it still turned out delicious. This one's a keeper folks. A word about chicken. Chicken thighs are the best part of the chicken. I think if you have to choose one part to cook, that's the one you should go with, it's hard to mess up really. It's white meat's, more juicy cousin. The expression, "juicy thighs" must have it's origin from a man who knew his way around a chicken. (Ok, I may have just grossed myself out there, but maybe now you'll remember it). I didn't even realize I really liked chicken until I made the switch to using dark meat after eating one too many chicken strips in salad that tasted no better than styrofoam popcorn.

The genius of this simple recipe is that it is cooked in separate parts almost completely, and then bakes together with a vinaigrette poured over for flavor. The result is crispier chicken and perfect roasted potatoes. It was hearty but not heavy. I finished it with a dash of balsamic vinegar right before I served it because I just love balsamic and rosemary together. It was a success despite the substitutions. This rustic chicken bake is a simple pleasure you should try, but would you mind coming over and doing my dishes for me first? That would be lovely.

Chicken Potato Tomato Bake

Adapted from Jamie at Home, by Jamie Oliver.

1 lb. small potatoes (new potatoes, red potatoes, whatever is in season) 6 boneless chicken thighs, preferably free-range, antibiotic free chicken Olive oil 1 14oz. can of diced or whole tomatoes, drained of juices Fresh rosemary, a few sprigs Red wine vinegar and balsamic vinegar

Scrub the potatoes and put them to cook in a pot of boiling, salted water.

Preheat oven to 400 degrees Fahrenheit.

Clean chicken and cut each thigh into 2-3 pieces. Put in a bowl and toss to coat with a few tablespoons of olive oil and kosher salt and freshly ground pepper. Heat a heavy oven safe skillet and fry chicken, skin side down until almost cooked, about three quarters of the way done. You may need to do this in batches. Don't move the chicken or flip it or you'll lose the sear.

When potatoes are fork-tender, drain and place in a bowl. Lightly smash each one with a fork. Set aside. Drain tomatoes and set aside.

Make the vinaigrette either in a mortar and pestle or finely chop the rosemary and muddle with about 3 tablespoons of olive oil and 1 tablespoon of the red wine vinegar, and pepper.

Once all the chicken is cooked, place it all back in the pan with the potatoes and tomatoes tucked in around it. Pour the vinaigrette over the pan and bake in oven for about 25 minutes, or until chicken is no longer pink. Before serving, splash a bit of balsamic vinegar over the dish.

Peanut-Sesame-Soba-Noodle-Salad

Cold sesame noodles are ubiquitous on Chinese take-out menus but I've never been a huge fan. The cold sticky sloppy mess of noodle just never appealed to me as much as other options. Then one day I was looking around for something to do with soba noodles (Japanese buckwheat noodles, if you're not familiar with them). They are one of my favorite healthy go-to staples in the pantry and what reminded me this would be a good submission for Fight Back Fridays. Soba are often served in noodle soups, or served cold with a dipping sauce. That is what gave me the idea for this dish. A noodle salad that I could whip up for work week lunches, as well as a light dinner that would be more substantial than a green salad. The items that you add in can be altered to suit your preferences or what's in your fridge that night.

A quick dressing of creamy peanut butter (all-natural of course), soy sauce, sesame oil, ginger, garlic and honey are blended together to make the dish. I think the peanut-sesame combo is the key here. Peanut-sauce is often too much peanut-butter flavor with nothing else. Here, when mixed with the soy sauce and enough heat (from red pepper flakes or sriracha) it is more balanced and, frankly more interesting than the one-note flavor it has on its own.

The only add-ins to this salad I strongly suggest be included are chopped scallions and cilantro, to keep with a South-Asian flair. These flavors just work together and brighten up the peanut-flavored sauce. The rest is up to you. Make a batch of this to have on hand during a hectic week of pre-Thanksgiving cooking madness. As long as the dressing is made, you only have to take the 3 minutes to boil the soba noodles to pull it all together. Save yourself from greasy take-out in the weeks leading up to Thanksgiving. Or, take this for lunch the week after, because there are only so many leftover turkey sandwiches that any person should have to endure.

Peanut Sesame Soba Noodle Salad Adapted from Recipezaar. Do not dress the noodles too far in advance or they may get a bit soggy. For the dressing: 1/2 cup smooth all-natural peanut butter 1/4 cup soy sauce 1/3 cup warm water 2 tablespoons peeled fresh ginger, chopped 1-2 teaspoons fresh minced garlic 2 tablespoons rice wine vinegar 1 1/2 tablespoons sesame oil 3 teaspoons honey 1/2 teaspoon crushed chili pepper flakes or sriracha

For the salad: 1/2 package soba noodles, cooked and rinsed under cold water 3 scallions, chopped (green and white parts) 1 red bell pepper, seeded and cut into thick strips 1/2 cucumber, seeded and chopped 1 large handful of cilantro

Using a blender puree all the dressing ingredients until smooth (about 2 minutes). Alternatively, whisk all ingredients until they appear well combined.

Cook the soba in a large pot of boiling salted water until tender about 2-3 minutes; drain and rinse well under cold water to stop the cooking. Transfer to a large bowl, then add in the remaining salad ingredients.

Just before serving pour the dressing over the cooked pasta and veggies. Toss well to combine.

Testing-New-Thanksgiving-Desserts-Fig-Crostata

PB140051.JPG I'm a sucker for a pretty package, so when I saw the photo of the crumbly, flaky, lattice-topped fig crostata in November's Gourmet magazine, I instantly wanted to make it. I thought finding a new option for the dessert table on Thanksgiving could be a good idea. Then I remembered I come from a family of non-adventurous eaters, and die-hard traditionalists. It's apple or pumpkin or nothing. I figured that should not hold me back. I could bake this a week early, and find out for myself if it was as delicious tasting as it was attractive. Maybe it would be worth trying to convince my dining companions this Thanksgiving to give something new a try.

PB140029.<span class=

A crostata is an Italian form of pie made of a shortcake cookie-type of dough. It has as many variations and the internet is filled with recipes where a crostata dough is used as a free-form crust where the sides are folded around the filing, similar to a French galette.

PB140041.<span class=

This recipe is made in a springform pan, where the crumbly dough is rolled out and simply pressed into the pan and up the sides. That's easy enough. The lattice-top is a bit more involved. I'll admit anytime I've tried to make a lattice-topped pie crust it ends with a lot of cursing and frustration as my strips soften and fall apart as I try to place them on top. Inevitably I often throw my hands up in defeat and roll the whole mess into one big ball and try for a normal pie crust. But, I finally have figured out that the freezer is my friend and I can fix this problem by popping the strips into the freezer to flash chill if they get difficult to work with. This trick saved the day and made the intricate, impressive looking top easy enough for even novice bakers.

PB140045.<span class=

The filling smelled incredible while cooking and filled the kitchen with those warm spice aromas that we associate with the holidays. I'm sad to say that when it was all pureed and baked it tasted like an orange flavored fig newton. It was tasty, but the similarity to a fig cookie made it not that desirable as a holiday dessert. On the other hand, it also made it seem healthier than a pie and I ate it for breakfast today.

My official taste-test verdict? If you're a fig enthusiast, this pie is worth a try. But be prepared for the harsh reality that like me, you find that you are more like your family than you care to admit, and realize that it ain't turkey day without a pumpkin pie.

PB140060.<span class=

Fig Crostata Recipe from Gourmet Magazine, November 2009

For Pastry Dough 2 cups all-purpose flour 1/4 cup granulated sugar 1/2 tsp salt 1 1/2 sticks cold unsalted butter, cut into 1/2-inch cubes 2 large egg yolks 1 tsp vanilla extract 1 Tbsp cold water

For Fig Filling 12 oz soft dried figs, stemmed and coarsely chopped 1 1/4 cups water 1 cup fresh orange juice 1/2 cup packed dark brown sugar 1 stick unsalted butter, melted and cooled 3 large eggs, lightly beaten 1 tsp vanilla extract 1 tsp grated orange zest 1 1/2 cups walnuts, coarsely chopped

To make the dough: Blend together flour, sugar, salt and butter in a food processor just until mixture resembles coarse meal with some roughly pea-size butter lumps (alternatively do this in a bowl with your fingers). Add yolks, vanilla and water and pulse until incorporated and dough begins to form large clumps. Turn dough onto a lightly floured surface and divide into 4 portions. With heel of your hand, smear each portion once or twice in a forward motion to help distribute fat. Gather all dough together then divide dough in half and form each half into a 5-6 inch disk. Chill, wrapped in plastic warp, until firm at least 1 hour, or up to 3 days.

To make filling: Simmer figs, water, orange juice, and brown sugar in a medium saucepan, covered, stirring occasionally, until figs are soft and mixture is reduced to about 2 cups, 15 to 20 minutes. Pulse in a food processor until finely chopped (mixture should not be smooth). Transfer to a large bowl and cool slightly. Stir in butter, eggs, vanilla, zest and walnuts.

To make tart shell: Butter a 9-inch springform pan. Roll out 1 portion of dough between 2 sheets of parchment paper into a 12-inch round (dough will be soft; chill or freeze briefly if it becomes difficult to work with). Peel off top sheet of parchment and carefully invert dough into pan. (Dough will tear easily but can be patched together with your fingers). Press dough onto bottom and 1 inch up side of pan, then trim excess. Chill tart shell until ready to assemble.

Roll out remaining dough between parchment into 12-inch round. Peel off top sheet of parchment, then cut dough into 10 (1-inch wide) strips and slide (still on parchment) onto a tray. Chill until firm, about 10 minutes.

Assemble crostata: Spread fig filling in shell. Arrange 5 strips of dough 1 inch apart on filling. Arrange remaining 5 strips 1 inch apart across first strips to form a lattice. Trim edges of strips flush with edge of shell. Sprinkle top with sugar.

Preheat oven to 350 degrees Fahrenheit. Bake until filling is slightly puffed and pastry is pale golden, about 30 minutes. Cool completely, then remove side of pan. Gourmet suggests you serve crostata with mascarpone.

Peach and Blackberry Cobbler

I finally found some time to bake for Dessert Corps again this week. I really do love doing it, even if it's very hard not to take a taste of the finished product. I'm also considering this post as my contribution for Fight Back Fridays, because allowing the soup kitchen to serve homemade desserts rather than the food "product" alternatives is food justice in action. Sometimes I think about doing a quality control, but in the end self-control kicks in and I choose not to hand over a dish with a piece missing, but boy oh boy it was hard this week. P8050185.JPG The local CSAs donate some of their extra fruit during the summer months to the soup kitchen, so I didn't pick my fruit, it picked me. I kind of like the surprise element to it all. This week they had some extra doughnut peaches (also known as Saturn peaches or pan tao peaches) and blackberries. Doughnut peaches are a very sweet heirloom variety of a peach that are delicious. They are also less acidic than the larger more common variety of peaches. I set out to think about what to do with these star ingredients. I love the combo of blackberries and cornmeal but wanted to make a one-dish dessert that would be easy to serve, so that ruled out making a blackberry sauce. I also wanted to utilize all the fruit so it didn't go to waste. I was leaning towards a cobbler but I wasn't super excited about it. Then I found a recipe for a cobbler that incorporated cornmeal into the biscuit topping. Indecision ended there. Blackberries and cornmeal baked goods (think pancakes) are a natural pairing. That matched with the sweetness of the peaches would be excellent. Cobblers are a pretty simple dessert to make and don't require any stand mixers or fancy equipment. I have always loved old-fashioned American style desserts despite their humble techniques and plain Jane appearances. There is something so comforting to me about being able to whip up a dessert with not more than a bowl and a wooden spoon (dream bubble pops above my head to my creepy 1950's sitcom fantasy of me and one of those frilly half-aprons setting out a pie to cool in my window). Back to reality and East Williamsburg. Regardless, a cobbler dough is a cinch to put together all in one bowl. It is a type of biscuit dough and as soon as you mix the wet ingredients into the dry ones you can smell that doughy goodness. Set that aside while you prep the fruit. Peel and dice your fruit, peaches in this case, and mix in a pot with a thickening agent, in this case cornstarch and some sort of sugar, a bit of lemon juice, cinnamon and a pinch of salt. Mix together and let cook for a mere five minutes. You're fruit mixture will be transformed what looks like and smells like the inside of a slice of warm pie. Yum. I think I might consider using less sugar next time, because I was concerned that the amount used in this recipe might mask the natural flavor of the peaches. But, being that this recipe was Southern in origin, I just went with it.

After the peaches are cooked all that is left is to assemble the cobbler. Mix the berries into the peach mixture, very carefully. Then pour into a greased baking dish (note the one in the photo is obviously too large, but I couldn't find a smaller disposable size to bring to the soup kitchen) and drop tablespoons of the biscuit dough all over the top of the fruit mixture. Maybe it's just because I didn't actually get to have a dish for myself but I can still smell how delicious it was, a mix of aromas of warm peach pie and freshly baked biscuits. Incredible, really. I just hope that it the diners thought it tasted as good as I thought it smelled.

Peach and Blackberry Cobbler Adapted from Epicurious and Down Home with the Neelys. Try this in winter time too with whatever is in season (apples, pears).

For the Biscuit Dough: 2 cups all-purpose flour 1/4 cup cornmeal 1/4 cup sugar 1 tablespoon baking powder 1/2 teaspoon salt 5 tablespoons cold unsalted butter 1 cup whole milk 1 large egg, lightly beaten

For the Filling: 2 pounds fresh peaches, peeled, pitted, and sliced 1 cup brown sugar 2 teaspoons lemon juice 2 tablespoons cornstarch 1/2 teaspoon ground cinnamon Pinch salt 1 teaspoon pure vanilla extract 2 pints fresh blackberries

To make the biscuit dough - whisk together the flour, cornmeal, 1/4 cup sugar, baking powder, and salt. Cut in the butter until the mixture resembles coarse crumbs (using your hands works well). Using a fork, stir in the milk and egg just to combine.

Preheat the oven to 350°F. Generously butter a 7 × 11-inch baking dish.

To make the filling - take your prepped peaches and place in a saucepan with the brown sugar, lemon juice, cornstarch, cinnamon, and pinch of salt over medium-high heat. Bring the peaches to a boil, stirring frequently (this is an important step otherwise you'll have caramel). Reduce the heat to medium- low and simmer, stirring, until the sauce thickens and the peaches have softened, about 3 minutes. Remove from the heat, and stir in the vanilla and blackberries. Transfer the filling to the baking dish.

To assemble - use 2 tablespoons, one to scoop up batter and the other spoon to push it off the spoon onto the fruit mixture. Drop spoon fulls of batter to cover the fruit evenly. Sprinkle the tops of the biscuits with some granulated sugar, and bake for 25 to 30 minutes, or until the biscuits are golden brown and the filling is bubbly and thick around the edges.

Cool for 10 minutes. Would be great served warm with ice cream.

Zucchini linguine martini bikini Fritters

P7310198.JPGI made zucchini fritters the other night. A fine thing to make to use up some of the mid-summer abundance of squash. While I was standing there with my box grater, grating up zucchini I kept hearing Vince, this hysterically energetic infomercial guy who sells some chopping kitchen gadget. At one point in this particular commercial while he's demonstrating all the things you can grate, he says things like, "fettuccine, linguine, martini, bikini". Hey, what about zucchini, that rhymes too! (This guy has a ton of ridiculous lines one of my favorites being, "stop having a boring tuna, stop having a boring life" that I can't seem to get out of my head, probably cause his commercial is on once a morning while I'm trying to watch for the weather.) Anyways, if you haven't seen Vince in action, it's kind of funny in that infomercial way. Watch it here (localappetite does not endorse the use of this product, only the use of this kind of enthusiasm for cooking). P7300187.JPG In case you hadn't guessed by now, I've been on a one-dish kick this summer. It's insanely hot in my kitchen and basically when I have the time to cook, I'm not making entire meals. Something fresh and tasty that utilizes my CSA produce is basically the only thing that has been motivating me this summer. I've just been rounding out the meals with more cheeses, eggs, dips and fruit. It has been a good way to handle eating at home without being in the kitchen for too too long. I was a little hesitant to fry for these fritters. But, Nigel Slater's entry on the same in The Kitchen Diaries had been in the back of my mind for some time. The only essential step to this process is the time to allow the zucchini to sufficiently drain (see photo above) otherwise you'll end up with soggy fritters that will fall apart when you try to cook them.

The one surprising thing about this recipe was that it added an extra step, which although I followed, I think I would recommend you omit it. Instead of simply mixing the grated drained zucchini in a bowl with your binders, egg and flour, and then frying, he writes that you should saute it all in a pan first and then add the flour and egg and then make little balls and fry in a second pan. I thought he might be onto something (maybe it added extra flavor or helped to further dry out the squash?), but after cooking the recipe through, I think it was an unnecessary step, leaving you with an extra pan to clean. I wouldn't want to do that to you. Either way you do it, you'll end up with light and moist zucchini fritters, if you don't flatten them too much into more of a pancake shape. As you know zucchini works well with almost anything, but either feta or Parmesan would be interesting. I used dill for the seasoning, but definitely just go with what you like or have on hand. And just like zucchini itself, this dish is versatile and will go with whatever else was on the menu for that night. Or, if you're like me, it's ok to just eat this and save room for dessert. It's too hot to eat a big meal anyways, right? P7300193.JPG

Zucchini Fritters Adapted from The Kitchen Diaries, by Nigel Slater

3-4 zucchini, grated Salt 1 small onion, chopped 1 clove of garlic, minced 1/2 cup grated cheese, your choice 1 handful of fresh dill, chopped 1 egg, lightly beaten 2-3 tablespoons all-purpose flour Olive oil

Coarsely grate zucchini and place in a colander. Salt liberally and allow to drain for about 30 minutes. When ready to use take handfuls of it and squeeze out any additional water before placing it in a bowl.

Mix drained zucchini with the rest of the ingredients. It will be a slightly stiff mixture. Heat a heavy pan with enough olive oil for frying. Drop mounded tablespoons into the pan and allow to brown. Keep your eye on them as the oil gets hotter (they will cook very quick at the end) and take care when flipping the fritters as they fall apart easily (a spatula and a fork together worked best for me).

Deconstructed Elote aka My New Favorite Summer Salad


Elote is the Mexican name for grilled corn on the cob smothered with crumbly cheese, lime juice and a bit of cayenne pepper. It is a specialty in the Yucatan peninsula and lucky for me available in various restaurants and flea markets around Brooklyn, if you know where to look. However, if you haven't had one of these, please stop reading and go find one. It truly is one of the best street foods I can think of. It transforms a cob of corn into an explosion of flavor. I would make this treat for myself on a regular basis if I had access to a grill, but since I don't (sob, sob) I used to just wait until I went out for Mexican food to have it. That all changed last night. I think I'll probably make this little beauty of a salad at least once a week, or as long as I have access to the fresh ingredients. My corn on the cob actually came from my CSA. Now if we could only grow avocados up there...
On the issue of eating locally, I have been thinking a lot about how cooking different cuisines can work with a sustainable cooking philosophy. There are always going to be certain essential ingredients that are not going to be available locally if you're preparing dishes from regions and countries with a different climate. In summer I tend to cook a lot of Mexican or Mediterranean dishes, and things like citrus, or olives, or certain cheeses aren't locally sourced in the Northeast where I'm located (as far as I know). It's in these situations I think there is room for flexibility. The goal is to support sustainable food and food purveyors by voting with your fork, but it is not to suffer in the process. I think eating local is the right thing to do, and if everyone did it there would be a change in our broken food system. But, I also think allowing yourself to purchase things that are unavailable in your region is alright too. Phew. Glad I got that off my chest.

Back to the dish. I got the idea for this salad after reading Mark Bittman's article last week in the NY Times Dining section. It was another one of his mega-lists of quick and genius flavor combinations. If you missed it, go and read it here. I know I'm going to use this list again and again when I'm having a cooking block. It's no coincidence that I picked his idea for deconstructing elote for a corn salad as my first dish. It is perfect for a picnic, or when you don't have access to a grill. Or for someone who just wants to eat with a fork.

Basically, you take the corn off the cob and quick roast it until it gets a bit brown in a skillet. This will cause a wonderful toasted corn smell to infuse your kitchen. Combine that with the essential components of elote, fresh lime juice, creamy queso fresco, and some heat (either cayenne pepper or chilis) and you have elote in a bowl. I added a few ingredients to plump up the salad, which just made it a bit more into a meal. Once done, take your salad and a cold cerveza onto your fire escape and you can almost pretend you are sitting in a plaza in Mexico as the sun sets. Buen provecho!

Deconstructed Elote Salad
I mixed the leftovers with some cooked shrimp for lunch today. Options are endless.

3 ears of corn
queso fresco (to taste)
fresh lime juice (about 1 big lime or 2 small ones)
1 jalepeño, deseeded and minced
cherry tomatoes (about 1/2 cup)
1 scallion, chopped
cilantro (small handful)

Take corn off the cob with a sharp knife. Place in a pan with some olive oil and cook stirring to avoid it sticking, till the kernels have a toasted look to them. Place in a
bowl and mix with the cheese and lime juice. Chop all the other ingredients
you're using and mix together. Easy Peasy.

A Simple Red Pickle

I really like pickled things. There are some vegetables I like even better pickled than raw, such as red onions. Lucky for me making pickled red onions is a snap. They will keep in the fridge for a few weeks (or more) to help add something extra to a sandwich, a salad, or whatever needs jazzing up. I have not ventured into the world of canning, yet, but these types of pickles do not need preserving that way. You can pretty much quick pickle almost anything, but red onions are the ones I think everyone should try. Yes, I know it's been done before. And, yes I know this isn't going to be an amazing culinary creation that will make you a bit hungrier as you read this. But, I can tell you that having this jar at your disposal, really does brighten up an otherwise dull dish. It's a condiment in the spirit of Fight Back Fridays as it is definitely better for you than any store bought, corn syrup loaded, preservative-laden, condiment you can purchase.

These red onions are tangy, and sweet. They have the satisfying pickle crunch that people love. They're acidic, and depending on your pickling spice of choice, possibly spicy. And, they're EASY!! Before I made these quick pickles I never would have guessed, how easy. Take a red onion, or two, or three. Get out your sharpest knife, or a mandoline if you have one. Slice the onions as thin as you can get them. P7210116 Next, you have to prepare the pickling liquid. There are probably a million variations of spice and flavoring for this kind of thing. One constant is the acid. Either apple cider vinegar, or red wine vinegar, or even rice wine vinegar if you were doing an Asian-inspired pickle. This time I was going with a recipe I found in my awesome Greek cookbook, The Olive and the Caper, by Susanna Hoffman, so I used the red wine vinegar. Put one part vinegar to one part water into a pan with a couple of tablespoons of sugar. I used raw cane sugar, but I have tried brown sugar in the past, which was very sweet and delicious too. I threw in a bay leaf for flavor. You can throw in some peppercorns, or other whole spices of your choice. Bring the vinegar-water-spice mixture to a boil. P7210126 Once the sugar has dissolved, it's ready. Pour over the onions to let them marinate before refrigerating. P7210132 After about 45 minutes, you can use them right away. The flavor will get better over time though. So, pour the rest into a jar with a lid, and store in your fridge to use over, and over again.

Apricot Clafouti pour moi

Apricots are a gamble. They look to me to be a tiny, tasty smaller cousin of a peach. When I saw them in the farmer's market on Saturday, I assumed they would be as sweet as the fruit they were sharing the table with, cherries and plums. But, as Nigel Slater wrote about apricots in The Kitchen Diaries, "their eating quality depends more on luck than good judgement." Although this statement made me feel a bit better about my purchase, I still had a basket of gorgeous, but very tart, fruit on my hands. Personally, in the summer when fruit is as juicy as it is right now, I hesitate to bake it into anything. Sweet fruit is a dessert all on its own. Sunday night was a different story. I wasn't going to let my apricots go to waste. I took Nigel's advice and decided to "tease out their flavor with warmth" (why paraphrase when he says it better than I could?). I decided to go with a classic French dessert, the clafouti. Clafoutis are traditionally made with cherries, but many different types of fruit would work well. For instance, Julia Child gives different variations using plums, pears or blackberries (although she didn't mention apricots, maybe it is not traditional). I took my recipe from the San Francisco Chronicle cookbook (my favorite favorite cookbook of all time). It is essentially a pancake-type of batter poured over fruit. Some variations (I checked quite a few) use more cream than others and some seem more custard-y than others. Regardless, this was my first clafouti, so I guess I have plenty of room to try others. It did remind me of a Dutch-pancake, something I used to make for brunch sometimes, which is also a batter poured over fruit that puffs up as it bakes, and deflates quickly as it cools. I think in the end my clafouti was satisfying, although the apricots were still quite tart even after baking. The batter was lighter than a cake, but more egg-y tasting than a pancake. If I replicated this dish, I think the apricots could benefit from marinating in some kirsh and sugar, a Julia Child suggestion from Mastering the Art of French Cooking. I'll admit I probably should have had another basket of apricots to place in the cake to sufficiently cover the pan. But, then again, sometimes home cooking is about making due with what you have, and I only had one basket of apricots. Looking at the positives - I liked that it wasn't as heavy as a cobbler would have been, had I done that instead. I even think the leftovers could make an acceptable breakfast, and what's better than dessert for breakfast?

Fresh Apricot Clafouti Adapted from a recipe by Georgeanne Brennan in The San Francisco Chronicle Cookbook. I noted where I substituted ingredients, but if I set out to bake this again, it would be preferable to have the full-fat dairy ingredients.

1 cup milk (I used reduced-fat only cause that's all I had) 1/4 cup heavy cream (I used light cream) 1/4 cup brown sugar 3 eggs 1 tablespoon almond extract (I used vanilla) 1/8 teaspoon salt 2/3 cup all-purpose flour apricots, halved and pitted (enough to cover most of the pan)

Preheat the oven to 350 degrees Fahrenheit. Butter a deep baking dish. Combine all the ingredients, except for the apricots in a mixing bowl and beat with an electric mixer until frothy. (Alternatively, mix all the ingredients in a blender if you prefer).

Pour just enough batter into the pan to cover the bottom with a layer about 1/4 inch deep. Put the pan into the oven for 2-5 minutes, or until just set.

Remove pan from the oven and arrange apricots face down evenly around the pan. Pour the remaining batter over the apricots. Bake until puffed and brown, about 30-35 minutes. It is done if a knife inserted in the center comes out clean.

Serve warm and sprinkle with powdered sugar.