Lucid Food at my local library

IMG_1121.JPG
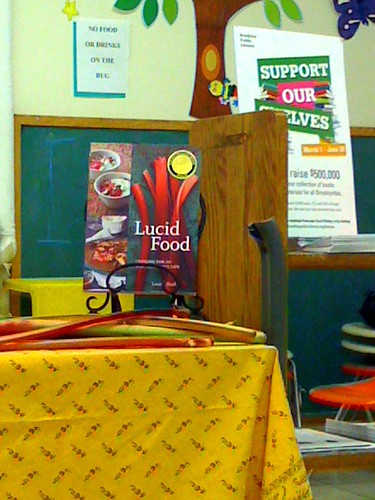
One morning I was on Twitter when I saw Louisa Shafia mention an event she was doing that afternoon to help support the Brooklyn Public Library. Louisa is the author of Lucid Food, a phenomenal cookbook specializing in local foods and seasonal eating. The recipes are all accessible to cooks of any level. I had known about her cookbook for awhile, but I had never picked up a copy, having borrowed one from the library in an effort to curtail my cookbook buying addiction. After learning that we share a local library (the same one from A Tree Grows In Brooklyn!), and that she'd be doing a demo sharing her knowledge of cooking with farmer's market ingredients, I was in. Going to the library to talk vegetables was suddenly more exciting than I could have possibly imagined. DSCN0965.JPG 
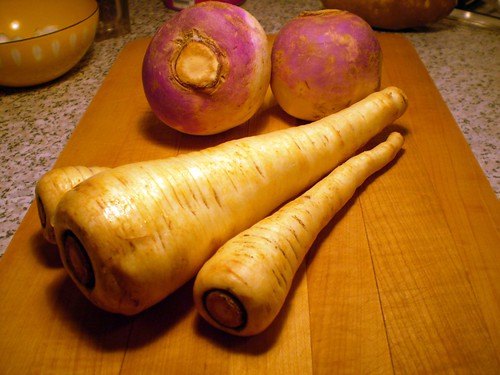
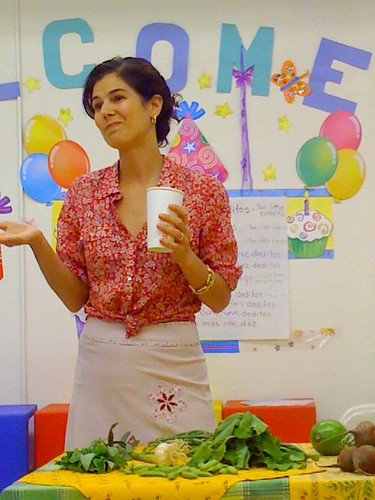
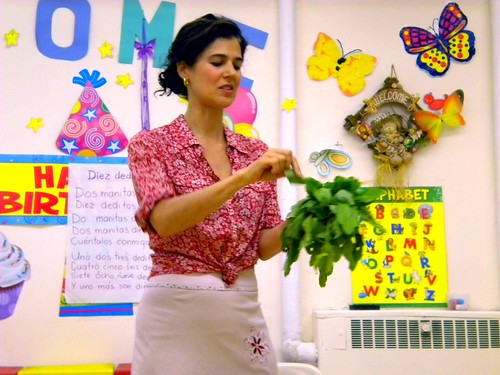
Louisa came armed with samples of all her favorite seasonal ingredients currently available at the greenmarket that we passed around, smelled, and tasted when possible. I realized there are a lot of leafy greens I have been skipping right over at the market. Hello sorrel, how have I been ignoring you all this time?! They sell locally grown Shiso leaves in Union Square? I guess I was going, but falling into the trap that she mentioned, just going straight for my favorite (safe) foods, without really seeing the bounty of what was available.

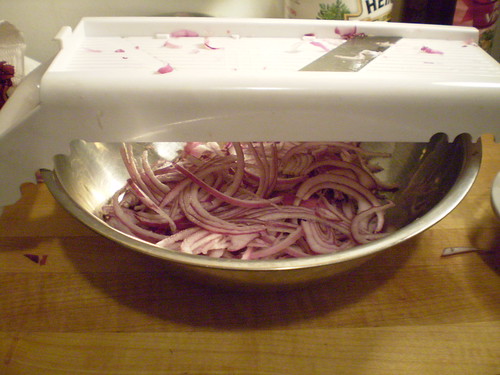
When faced with a new vegetable she said you can always ask the vendors for cooking suggestions. About 99% of the time, someone will suggest to saute it with butter or olive oil and garlic. And, truth be told, when doesn't that work? It reminded me that, I don't need a recipe in mind to buy something I've never cooked before. In fact, later that week, I (finally) had the courage to try cooking the radish greens that I had been shamefully discarding. As a child I was utterly disgusted by leafy greens, but I've been working hard to get over that fear even if I find it subconsciously influences my cooking from time to time. I'm pretty much cured at this point, happily eating spinach, all types of chard, kale and...now radish greens! Seriously, they were so much more flavorful than I expected. And, yes, I sauteed them in olive oil with garlic, onion, and lots of salt and pepper. Proof here.

Louisa gave so many wonderful tips about the ingredients in season right now that, I've listed the highlights for you at the bottom of the post. To really learn all she knows, I encourage you to pick up a copy of Lucid Food. As all my trips to the library end, I came out a bit smarter than I went in...and this time with an arm full of recipes to try. She encouraged all of us to force ourselves to explore at the market, and I've been heading her advice every week since. IMG_1120.JPG

Summer produce to try

Shiso Leaves - release the aroma by rubbing the leaves. Sometimes called Beefstake plant. Use to add a meaty flavor to dishes. Throw them in at the end of cooking, like an herb.

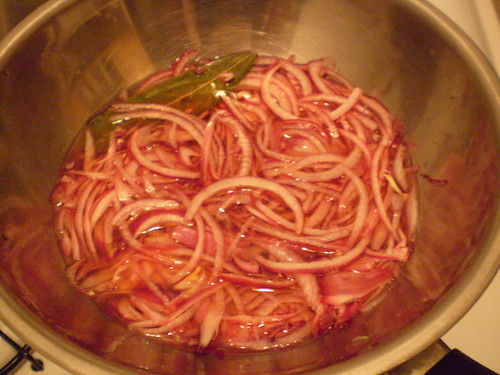
Garlic Scapes - they are the green end of the garlic head. Great pickled. (I like using them to make a pesto.)

New Young Garlic - sweeter than older garlic found in the supermarket. You can use the whole long stem like a leek. (I had no idea!)

Thai Basil - used in South Asian dishes, super fragrant. Combines well with mint. Try it in a stir-fry, or summer rolls.

Sorrel - used to be more popular. It's flavor is sour and lemon-y. Will add a lemon flavor to dishes, great with shrimp, and you can make soup out of it.

Rhubarb - little too late right now for this, but when you find it, use it in sweet (compotes or pies) or savory dishes, such as paired with a fatty meat. Don't eat the leaves, they are toxic. Contains lots of Vitamin C.

Baby Beets - sweeter and more tender than larger ones. Leaves are delicious too, if cooked like spinach. Try them in a salad, sliced thin. Lucidfood.com has a beet burger recipe.

Fava Beans - have to take seeds out of the pod, boil them for 10 minutes, then pull the membrane off. Grill them whole, or puree them like a hummus. (Note: these may be gone by now - check your market).

Sugar Snap Peas - great raw for a snack. Slice them thin for a salad.

Avocado Zucchini - it's a type of zucchini shaped more like an avocado. Contains less water content than the usual variety.

Sunchokes and a twist on patate pizza

At the Union Square greenmarket late on a Saturday, I stopped at the Paffenroth Gardens stand looking for some butternut squash. Two of the women working at the farm stand table were discussing the miracle-like qualities of sunchokes, aka Jerusalem artichokes, to cure diabetes. I stood there long enough to pretend to be examining the produce left on the table to overhear claims of how eating these little knobby tubers regulated a woman's blood sugar levels. I was intrigued. Maybe I should be eating these? Why aren't I eating these? I grabbed a green net pint box and started filling it up with these unimpressive looking veggies. I quickly checked with the above mentioned sales lady, "I cook these just like a potato?", I asked. "Yep," "However you like your potatoes, you'll like these. Roast them, or mash them." I threw them in my bag and off I went feeling brave and adventurous, completely forgetting about the obligatory butternut squash. 

I went home and all my plans of roasted sunchokes went out the window when the memory of Jim Lahey's Patate Pizzathat you can get at the Sullivan Street Bakery suddenly came to mind. And that's all I could think about. Forget roasting and mashing, I needed to know if the supposed delicate flavor of the sunchokes could star in their own version of a pizza. Lahey's potato pizza is the stuff of my dreams. Bread and potatoes and cheese being high up there on my list of foods that make me happy. I'm a simple girl, really. If you have never been to the Sullivan Street Bakery, you need to go. If your scared of carbs, I can only suggest you stop living in the past, and start embracing the staff of life. I used the dough I already had in my refrigerator for the pizza dough. It was a whole wheat dough from Artisan Bread in 5 Minutes a Day that I keep in there to make batches of bread, but it also works in a pinch for pizza, as long as you're down with whole wheat pizza. That's where my "healthy" pizza attempts max out. I'll admit I could use a little work on the shaping of the crust. For the record, I was attempting a nice rectangle shape. At this point I was sort of winging it after consulting a few non-tomato sauce pizza recipes. I flavored the sunchokes much in the same way I would have had I roasted them - sauteing them in a pan with a little olive oil, some sliced garlic, fresh rosemary and salt and pepper. I sliced them on a mandolin first to ensure they'd be paper thin and pretty looking. For full disclosure, I should tell you that in addition to the amazing healthy properties sunchokes can have on your body, I have also read a lot about them being hard to digest, and causing some embarrasing gastro issues. I didn't notice any problems, but I did take the time to peel them first, since some sources suggested the culprit was in the skin. For a better discussion of the effects, see the very scientific and very opinionated comments on this post. If I was the type of person to have cocktail get-togethers in my fabulous loft, I would consider serving this in slices. However, I am definitely the type of person that pushes the limits on how much sugar she consumes, so I will consider eating more insulin- regulating-vegetables that can be served in the form of pizza. And, so should you.

Sunchoke Pizza Use a fresh store-bought dough, or your favorite pizza dough recipe. If you are an Artisan Bread in 5-Minutes a Day convert, use any of the recipes they suggest for Pizza dough.

1 pint of sunchokes, sliced on a mandolin (peeling is optional) 2-3 garlic cloves 3 sprigs fresh rosemary, or to taste 1-2 tablespoons olive oil 3/4 cup freshly grated Parmesan or Pecorino cheese

Scrub clean the sunchokes and slice them on a mandolin, or in even slices about 1/8 inch thin. Slice garlic cloves.

Heat olive oil in a saute pan until hot, add the sunchokes and garlic and rosemary and cook until the sunchokes taste almost completely cooked, meaning not totally mushy soft, but wilted. Keep an eye on it to not burn the garlic. Season to taste with salt and pepper.

Roll out your pizza crust. Brush with olive oil. Top with sunchokes, overlapping them as you fill the pizza surface. Leave an inch around the edges for the crust. Sprinkle the top with cheese.

Let cool slightly, slice and enjoy.

Bake at 450 degrees Fahrenheit on a pizza stone for about 10 minutes or until the crust appears done and cheese is melted.

Carrot coins in cilantro salsa

It's springtime and one of the things you can find at green-markets around looking lovely are big bunches of carrots. Maybe it's just me, but I feel like because carrots aren't trendy and tend to stick around longer than some other seasonal favorites, they often get overlooked for things like ramps. It's like baby got stuck in the corner, and it's not right. Sure, carrots are good for you and a workhorse for stocks, stews, and most slow winter cooking. But, the slender bright orange bunches of carrots you can find in the market now deserve to be the stars of a dish all their own.

Carrot salads are a good start, but I find briefly cooking carrots really brings out their sweetness. The truth is, I don't really love raw carrots, and would choose a celery stick over a carrot stick any day. Sure cooked carrots are tasty slathered in butter, like most things, but I wanted something a little lighter than that. When I was little, my grandma always used to make us take notice if she put together a dinner plate with lots of different colors on it. Little did she know, her choice of different colored foods was actually a good way to measure how healthy dinner was that night. (Although from high school through college mac and cheese from the box was my orange colored food of choice). Orange foods are high in beta-carotene and vitamins A and C. Paying attention to the color of your foods is actually an easy way to make sure you're eating a well-balanced meal. Click here for more examples. I've been paying attention to different ways to prepare carrots to find more ways that would appeal to me, anything but that dreaded bag of mini carrot sticks that I can't seem to escape. Has every woman in the U.S. been brainwashed into thinking the only way to stay thin is to eat nothing but mini-carrots?! Ugh.

I first made this cilantro salsa a few nights ago for some pork tacos that I was making. I was excited that it needed exactly the herbs I had growing in my windowboxes . This sauce is incredible. It would be perfect over any grilled meat or fish, and just the smell of it made me think that I would win over a lot of people if I served it that way. I immediately thought about all the things I envisioned myself doing with this sauce throughout the summer. Then I saw these carrots in the back of my fridge yesterday and I thought this sauce was so good I bet slathering carrots in it would work. I started by slicing the carrots very thin, thinking they'd taste even sweeter the thinner they were. I knew I didn't want to try grating them because grated carrot salads sometimes seem too weighted down with dressing for me, and a grated carrot salad is never as crunchy as a slaw. But these little coins retained their bite even after a brief dip in boiling water. I can't take credit for the pairing, because that is all Debra Madison's genius. I can only take credit for the fact that you now have no excuse to ignore the carrots at the market the next time you see them.

Carrot Coins in Cilantro Salsa Adapted from Debra Madison's Vegetarian Cooking for Everyone. This salsa is completely addictive and you'll find yourself wanting to put it on everything. If you like capers they'd be great tossed in here as well.

Peel and slice 1lb. of carrots (or less depending on how many your feeding) into paper thin coins. The thinner they are the faster they'll cook. Toss in a pot of salted boiling water for about 5-10 minutes, or until fork tender. Remove and rinse in cold water to stop the cooking. Drain and toss with the cilantro salsa . Serve warm or chilled.

Cilantro Salsa 1 jalapeño chile, seeded 1 bunch of cilantro 1/2 cup fresh mint leaves 1-2 garlic cloves 1/2 cup olive oil 1/4 cup water Juice of 1 lime 1/2 teaspoon ground coriander Salt & pepper to taste

Chop all the herbs and garlic very finely. Mix in lime juice, water and oil. Then stir in spice and season to taste.

Beating the winter doldrums with chili spiked whipped root vegetables

February produce in a four-season climate leaves much to be desired. Chances are most of you don't associate joy with the word turnips. Does the thought of parsnips make you wonder if you can live on pasta alone till spring? If the avocados and tomatoes in your supermarket from far away have you thinking about cheating on your attempts to eat more seasonally consider this -chili spiked whipped root vegetables. I promise they're as creamy and comforting as a bowl of regular mashed potatoes, and with a little extra spice they're just the thing to help you get excited about what little we have to work with this time of year.

This dish is made up of a mixture of parsnips, turnips and a potato or two. It could easily be adapted to whatever root vegetables you prefer. If you have never considered cooking a parsnip or a turnip, let this be your gateway dish. After all, when you add butter and sour cream to a vegetable it becomes much more enticing to most skeptics. The chili powder is an idea I borrowed from a mashed potato recipe in the The San Francisco Chronicle cookbook. The recipe suggested the chili was supposed to "chase away the blues" and I figured given my less than cheery disposition (and most people I came across) this past Monday, it was worth a shot. What resulted was a buttery, slightly sweet, red-hued dish that should wake you up from your winter doldrums and make your diners take notice. The spice is gentle enough that this is definitely still comfort food. Turnips and parsnips are slightly lighter than plain old potatoes, and if you take the time to whip them they will produce an almost fluffy puree. (I was able to get a consistency I was content with using a hand-held mixer. If you were serving this for company and were aiming for a perfect puree it might help to pull out the heavier equipment, the stand-mixer or a food processor). The start of Spring is only a month and a half away, but while we still have to brave the cold for a little while longer, do what you need to to keep your spirits up, especially if it involves a whole lot of butter and chili powder.

Chili-Spiked-Whipped-Root-Vegetables Recipe influenced and adapted from two different sources - the James Beard Foundation website and The San Francisco Chronicle Cookbook.

3 medium parsnips, peeled and diced 1 large baking potato, peeled and diced 2 to 3 medium turnips, peeled and diced 1/4-1/2 cup sour cream, or to taste 6 Tablespoons butter, softened 1 Tablespoon chili powder, or more to taste Coarse salt and white pepper to taste Chopped cilantro for garnish

Place the vegetables in a pot with enough salted water to cover. Bring to a boil and cook until the vegetables are very tender, about 30 to 40 minutes. Drain well.

Place the cooked vegetables in a bowl and whip until mashed (this can be done with a hand-mixer or in a stand mixer). Slowly incorporate the remaining ingredients, then whip at high speed for about one minute to lighten the mixture.

Stir in the chili powder and salt and pepper. Taste, and adjust seasons accordingly. Garnish with cilantro before serving.

First-Night-Carciofi-alla-Judea

PC100148.JPGHanukkah may have some traditional foods, potato latkes (aka potato pancakes) and sufganiyot (aka jelly doughnuts), but in general the rule is anything fried goes. So, while shopping for potatoes to make latkes, I changed my plans when I saw these striking artichokes in the market. I had to have them. They were beautiful and festive, perfect for a holiday meal. Next, I set out to think about what I could do with artichokes for the first night of Hanukkah. I recalled reading about a fried artichoke preparation that originated in the Jewish ghetto of Rome, simply called Carciofi alla Judea (for more about the history of this dish click here). I have never had one of these prepared for me, but I thought, "how could anything fried taste bad?" Unfortunately, there was nothing miraculous about this meal, except for the amount of olive oil I wasted. PC110153.JPG I jumped on this idea, lured by images of lightly browned, crunchy, earthy artichoke petals that would impress you and inspire you to put down the potatoes and fry something different. I didn't do my research. If I had I would have seen that this dish is best prepared with baby artichokes, for their more tender leaves. I might also have realized that frying them whole was an option, as used in some other versions of this recipe. PC110159.JPG The recipe that I found and put my faith in (it was on a great Jewish blog after all) called for peeling off the tough outer leaves and slicing the artichoke in half before you start on the two-step process of cooking them in a mixture of olive oil and water until softened (see the photo above), and then frying them until crispy. PC110167.JPG My artichokes looked like fried goodness, glistening as they came out of the olive oil. After a sprinkle of some fleur de sel salt and a squeeze of lemon I could barely wait to grab a piece. I started with the outer leaves that looked more well-done, hoping that it would taste like a crispy french fry. Not exactly. The tops of the leaves were tough and difficult to chew, if not near impossible. "Ok", I thought, not giving up hope, "the inside leaves will be better". They were better, but not great. In the end, I resorted to eating the leaves as if they were steamed, scraping the tender bottom part off and discarding the rest of the leaf. We agreed that it seemed like a waste and definitely not the intended result. PC110175.JPG The one saving grace of this dish was the artichoke heart. I guess that's why I couldn't be too upset. It was tender and a bit smoky tasting from the oil. It was definitely good eating, especially with a bit more salt. I'm sure my inexperience in making these was to blame for the flawed result. However, I bet they could be spectacular when done correctly, so please do not let that discourage you from trying this dish (just make sure to get baby artichokes). And, the best part of Hanukkah, there are 7 more nights to fry things and get them right.

Carciofi alla Giudia Reprinted from The Jew and the Carrot (http://www.jcarrot.org)

4 medium sized artichokes (look for vegetables with soft, long, flexible stems) 1 lemon Plenty of olive oil Sea salt to taste

Fill a large bowl with water and the juice of one lemon. Working one artichoke at a time, trim the stem to 1 1/2 – 2 inches. Using a vegetable peeler, remove the outer dark green layer of the stem, revealing the softer, lighter green center. Cut off the artichoke’s thorny top (horizontally) using a serrated knife and then carefully slice the artichoke in half, (vertically).

Remove the artichoke’s tough outer leaves until only the soft inner leaves remain. Using a small spoon, remove the hairy “choke” at the center of each artichoke half. (It may seem like you are wasting a lot of the plant –which is kind of true. Assuage your guilt by composting them!)

At this point, open your windows and turn on a fan!

Fry #1: Select a pot that is large enough to comfortably hold all of the artichoke halves. Place them in the pot, fill with oil until chokes are half covered. Then add water to cover. Bring pot to a simmer and cook, uncovered, about 15 minutes until they are cooked but not too soft. Remove with tongs and place on a platter.

Fry #2: Heat about one inch of oil in a cast iron pan (or other heavy pan). Using a pair of tongs, and lots of care, place the choke halves side down in the oil. Be really careful–hot oil splatters and hurts.

Fry for about 12 minutes, flipping the chokes halfway through, until brown and crispy on both sides. Turn off the heat and remove the fried chokes with tongs. Place onto paper towels to drain. Sprinkle with salt and serve warm.

Zucchini linguine martini bikini Fritters

P7310198.JPGI made zucchini fritters the other night. A fine thing to make to use up some of the mid-summer abundance of squash. While I was standing there with my box grater, grating up zucchini I kept hearing Vince, this hysterically energetic infomercial guy who sells some chopping kitchen gadget. At one point in this particular commercial while he's demonstrating all the things you can grate, he says things like, "fettuccine, linguine, martini, bikini". Hey, what about zucchini, that rhymes too! (This guy has a ton of ridiculous lines one of my favorites being, "stop having a boring tuna, stop having a boring life" that I can't seem to get out of my head, probably cause his commercial is on once a morning while I'm trying to watch for the weather.) Anyways, if you haven't seen Vince in action, it's kind of funny in that infomercial way. Watch it here (localappetite does not endorse the use of this product, only the use of this kind of enthusiasm for cooking). P7300187.JPG In case you hadn't guessed by now, I've been on a one-dish kick this summer. It's insanely hot in my kitchen and basically when I have the time to cook, I'm not making entire meals. Something fresh and tasty that utilizes my CSA produce is basically the only thing that has been motivating me this summer. I've just been rounding out the meals with more cheeses, eggs, dips and fruit. It has been a good way to handle eating at home without being in the kitchen for too too long. I was a little hesitant to fry for these fritters. But, Nigel Slater's entry on the same in The Kitchen Diaries had been in the back of my mind for some time. The only essential step to this process is the time to allow the zucchini to sufficiently drain (see photo above) otherwise you'll end up with soggy fritters that will fall apart when you try to cook them.

The one surprising thing about this recipe was that it added an extra step, which although I followed, I think I would recommend you omit it. Instead of simply mixing the grated drained zucchini in a bowl with your binders, egg and flour, and then frying, he writes that you should saute it all in a pan first and then add the flour and egg and then make little balls and fry in a second pan. I thought he might be onto something (maybe it added extra flavor or helped to further dry out the squash?), but after cooking the recipe through, I think it was an unnecessary step, leaving you with an extra pan to clean. I wouldn't want to do that to you. Either way you do it, you'll end up with light and moist zucchini fritters, if you don't flatten them too much into more of a pancake shape. As you know zucchini works well with almost anything, but either feta or Parmesan would be interesting. I used dill for the seasoning, but definitely just go with what you like or have on hand. And just like zucchini itself, this dish is versatile and will go with whatever else was on the menu for that night. Or, if you're like me, it's ok to just eat this and save room for dessert. It's too hot to eat a big meal anyways, right? P7300193.JPG

Zucchini Fritters Adapted from The Kitchen Diaries, by Nigel Slater

3-4 zucchini, grated Salt 1 small onion, chopped 1 clove of garlic, minced 1/2 cup grated cheese, your choice 1 handful of fresh dill, chopped 1 egg, lightly beaten 2-3 tablespoons all-purpose flour Olive oil

Coarsely grate zucchini and place in a colander. Salt liberally and allow to drain for about 30 minutes. When ready to use take handfuls of it and squeeze out any additional water before placing it in a bowl.

Mix drained zucchini with the rest of the ingredients. It will be a slightly stiff mixture. Heat a heavy pan with enough olive oil for frying. Drop mounded tablespoons into the pan and allow to brown. Keep your eye on them as the oil gets hotter (they will cook very quick at the end) and take care when flipping the fritters as they fall apart easily (a spatula and a fork together worked best for me).

A Simple Red Pickle

I really like pickled things. There are some vegetables I like even better pickled than raw, such as red onions. Lucky for me making pickled red onions is a snap. They will keep in the fridge for a few weeks (or more) to help add something extra to a sandwich, a salad, or whatever needs jazzing up. I have not ventured into the world of canning, yet, but these types of pickles do not need preserving that way. You can pretty much quick pickle almost anything, but red onions are the ones I think everyone should try. Yes, I know it's been done before. And, yes I know this isn't going to be an amazing culinary creation that will make you a bit hungrier as you read this. But, I can tell you that having this jar at your disposal, really does brighten up an otherwise dull dish. It's a condiment in the spirit of Fight Back Fridays as it is definitely better for you than any store bought, corn syrup loaded, preservative-laden, condiment you can purchase.

These red onions are tangy, and sweet. They have the satisfying pickle crunch that people love. They're acidic, and depending on your pickling spice of choice, possibly spicy. And, they're EASY!! Before I made these quick pickles I never would have guessed, how easy. Take a red onion, or two, or three. Get out your sharpest knife, or a mandoline if you have one. Slice the onions as thin as you can get them. P7210116 Next, you have to prepare the pickling liquid. There are probably a million variations of spice and flavoring for this kind of thing. One constant is the acid. Either apple cider vinegar, or red wine vinegar, or even rice wine vinegar if you were doing an Asian-inspired pickle. This time I was going with a recipe I found in my awesome Greek cookbook, The Olive and the Caper, by Susanna Hoffman, so I used the red wine vinegar. Put one part vinegar to one part water into a pan with a couple of tablespoons of sugar. I used raw cane sugar, but I have tried brown sugar in the past, which was very sweet and delicious too. I threw in a bay leaf for flavor. You can throw in some peppercorns, or other whole spices of your choice. Bring the vinegar-water-spice mixture to a boil. P7210126 Once the sugar has dissolved, it's ready. Pour over the onions to let them marinate before refrigerating. P7210132 After about 45 minutes, you can use them right away. The flavor will get better over time though. So, pour the rest into a jar with a lid, and store in your fridge to use over, and over again.